
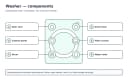
For a leaking washer, stop the cycle, keep clear of wet electrical areas, and close both water valves if flow continues. Dry the floor, then inspect external fill hoses, drain hose, standpipe, dispenser, and door gasket with the washer unplugged. Leak timing—during fill, agitation, drain, or spin—is often the best clue.
Quick answer: For a leaking washer, stop the cycle, keep clear of wet electrical areas, and close both water valves if flow continues. Dry the floor, then inspect external fill hoses, drain hose, standpipe, dispenser, and door gasket with the washer unplugged. Leak timing—during fill, agitation, drain, or spin—is often the best clue.
Before you start
| Item | What to expect |
|---|---|
| Tools | Absorbent towels, flashlight, dry paper towels, gloves, shallow tray, and model manual |
| Time | 15–45 minutes to inspect externally |
| Difficulty | Moderate; stop if access requires cabinet disassembly |
| Safety | Disconnect power before touching hoses or user-service areas; keep electricity and water separated |
Key takeaway: Tools: what to expect — Absorbent towels, flashlight, dry paper towels, gloves, shallow tray, and model manual.
Identify the exact model and read its manuals. Photograph the display and note the cycle stage. If laundry met sewage or floodwater, an ordinary wash is not proven sanitization. Follow public-health and fabric guidance; discard contaminated food.
Safety boundary: Unplug the washer before moving it, removing a panel, touching a hose connection, or reaching near the tub. Do not perform live mains testing, defeat a lid or door lock, bypass a fuse or ground, or improvise wiring. Washer work never requires gas-valve service, sealed-refrigeration work, or internal TV-capacitor repair; those are also outside the safe DIY boundary. Stop using the machine for a burning smell, smoke, repeated breaker trips, a hot plug, damaged wiring, or water near any outlet or electrical part. Shut off the water valves if a leak continues. CPSC appliance-recall guidance and NFPA electrical-safety guidance take priority over general troubleshooting.
Manufacturer verification: Model designs, diagnostic procedures, fasteners, hose routing, reset steps, and error indications vary. Find the full model number on the door opening, lid rim, or rear label, then confirm every procedure in that model's owner's manual or the manufacturer's official support site before buying a part or opening the cabinet.
Causes ranked by likelihood
The order below fits common household cases, but installation and symptom timing can change it.
| Cause | How to check | Fix | Difficulty |
|---|---|---|---|
| 1. Loose or damaged fill hose | Leak begins while filling or valves are open; moisture at threaded joints | Close valves and replace with approved hose or reseat connection | Easy |
| 2. Standpipe or sink overflow | Water appears during drain and rises from household drain | Stop use and have plumbing restriction corrected | Pro only |
| 3. Drain hose crack or poor connection | Leak appears mainly while pump runs | Replace or secure using model installation instructions | Moderate |
| 4. Oversudsing or dispenser overflow | Foam or water emerges near drawer or lid during wash | Clean dispenser and correct detergent type and dose | Easy |
| 5. Door boot, seal, or trapped item | Front-load leak at door; hair or item crosses gasket | Clean gasket; service any tear or loose retainer | Easy–Hard |
| 6. Pump, tub, seal, or internal hose | Water emerges beneath cabinet away from external connections | Stop operation and arrange internal diagnosis | Hard–Pro only |
Key takeaway: 1. Loose or damaged fill hose: how to check — Leak begins while filling or valves are open; moisture at threaded joints.
1. Loose or damaged fill hose
Why it happens: This condition may be intermittent because load weight, water level, and tub movement change through the cycle. Check for the specific pattern: Leak begins while filling or valves are open; moisture at threaded joints. A photo or brief written timeline can make a later professional diagnosis faster.
Check it safely: Observe only with all guards in place. After disconnecting power, inspect the user-accessible area named in the manual and stop if there is damaged insulation, corrosion, a seized fitting, or evidence that water reached electrical parts.
Corrective action: Close valves and replace with approved hose or reseat connection. If normal operation returns, inspect again after the test for dampness, movement, or a recurring display. A temporary improvement does not justify ignoring a safety symptom.
Difficulty: Easy. This rating assumes dry, ordinary exterior access. Tight spaces, stacked appliances, seized fittings, inaccessible plugs, and uncertain shutoffs raise the risk; use qualified help instead.
2. Standpipe or sink overflow
Why it happens: Treat this as a system problem until evidence isolates it. Water appears during drain and rises from household drain. A pump, motor, lock, sensor, and control depend on conditions elsewhere, so replacing the part named by an online search is not a reliable diagnostic method.
Check it safely: Use the least invasive check first and keep the washer unplugged during physical inspection. A stacked unit or one trapped in a closet may require professional moving equipment before even an otherwise simple connection is safely reachable.
Corrective action: Stop use and have plumbing restriction corrected. If that step requires force, cabinet opening, live measurements, or lifting the appliance, it is no longer the same DIY task. Give a technician the model number and the result of the exterior checks.
Difficulty: Pro only. This rating assumes dry, ordinary exterior access. Tight spaces, stacked appliances, seized fittings, inaccessible plugs, and uncertain shutoffs raise the risk; use qualified help instead.
3. Drain hose crack or poor connection
Why it happens: This is an important first check because it can imitate a component failure. Leak appears mainly while pump runs. Relate the observation to the exact moment the program changed; cycle timing is stronger evidence than where a puddle, sound, or message was first noticed.
Check it safely: Cancel normally, wait for all motion to stop, and unplug before touching the installation. Use a flashlight and compare the visible arrangement with the model diagram. Photograph it before adjustment. Do not reach through an opening or remove a fixed panel.
Corrective action: Replace or secure using model installation instructions. Change only this condition, then use a short, supervised test permitted by the manual. If the original symptom returns, stop; the failed test is useful evidence rather than a reason to run repeated cycles.
Difficulty: Moderate. This rating assumes dry, ordinary exterior access. Tight spaces, stacked appliances, seized fittings, inaccessible plugs, and uncertain shutoffs raise the risk; use qualified help instead.
4. Oversudsing or dispenser overflow
Why it happens: The control cannot always distinguish this condition from a bad part. The practical clue is: Foam or water emerges near drawer or lid during wash. Think about the load, detergent, plumbing, or installation change immediately before the problem began.
Check it safely: Make the observation from outside the cabinet. Disconnect power if a hose, foot, filter door, or connection will be touched. Keep hands out of the basket until it is completely still, and never defeat the door or lid lock to watch operation.
Corrective action: The appropriate correction is to clean dispenser and correct detergent type and dose. Restore every hose and cover before power is returned. One empty or lightly loaded confirmation cycle is more informative than several full-load attempts.
Difficulty: Easy. This rating assumes dry, ordinary exterior access. Tight spaces, stacked appliances, seized fittings, inaccessible plugs, and uncertain shutoffs raise the risk; use qualified help instead.
5. Door boot, seal, or trapped item
Why it happens: Washer symptoms often overlap at this stage. Here, the useful sign is that front-load leak at door; hair or item crosses gasket. Record sounds and display wording; “it stopped” is less useful than knowing whether it had filled, moved, drained, or accelerated.
Check it safely: Start with controls and visible exterior conditions. If inspection goes beyond that boundary, pause and obtain the service procedure for the exact model. Similar-looking machines can hide fasteners, wiring, and water paths in different places.
Corrective action: Clean gasket; service any tear or loose retainer. Stay present for the next test and keep the shutoff valves accessible. End the test at the first leak, burning odor, hard cabinet strike, grinding sound, or repeated electrical interruption.
Difficulty: Easy–Hard. This rating assumes dry, ordinary exterior access. Tight spaces, stacked appliances, seized fittings, inaccessible plugs, and uncertain shutoffs raise the risk; use qualified help instead.
6. Pump, tub, seal, or internal hose
Why it happens: This cause moves higher on the list when water emerges beneath cabinet away from external connections. It moves lower when the washer completes the affected stage normally during a small, balanced test. That comparison helps avoid ordering a part from a symptom alone.
Check it safely: Before checking, remove children and pets from the work area, dry the floor, and ensure there is a safe route to the plug and valves. Use the installation guide's measurements instead of judging hose height, cabinet level, or clearance by eye.
Corrective action: Stop operation and arrange internal diagnosis. Do not combine this change with detergent, cycle, and load changes at the same time. A controlled correction reveals whether this cause actually explains the problem.
Difficulty: Hard–Pro only. This rating assumes dry, ordinary exterior access. Tight spaces, stacked appliances, seized fittings, inaccessible plugs, and uncertain shutoffs raise the risk; use qualified help instead.
Brand-specific notes
Front-load machines from LG, Samsung, Electrolux, GE, Whirlpool, and others use model-specific boot shapes, clamps, vent paths, and dispensers. Top-loaders can splash from an off-level tub or leak from internal fill paths. Brand does not identify the source; cycle stage and exact model documentation do.
Samsung, LG, Whirlpool, Maytag, GE Appliances, Electrolux, Bosch, and other manufacturers revise machines within a product family. A shared logo or cabinet shape does not establish shared parts. Codes vary by model, so confirm in your owner's manual or the manufacturer's support site. Avoid generic “service mode” button sequences; they can operate components unexpectedly or erase useful history.
Use official support roots to locate documentation: Samsung, LG, Whirlpool, and GE Appliances. Enter the complete model, including suffixes when shown.
When to call a professional
Call promptly for water below the cabinet, a torn door boot, a corroded valve, a leaking pump housing, bearing or tub-seal evidence, or any water that reached wiring, receptacles, or controls. A plumber is appropriate when the standpipe, laundry sink, trap, or shutoff valve is the source. Leave power off after electrical exposure.
Ask for a written diagnosis and estimate. Costs vary by model, access, region, and parts availability. Amounts here are approximate US estimates, not sourced quotes. Check the warranty and CPSC recalls.
Choose an appliance technician for internal washer systems, an electrician for a damaged or repeatedly tripping circuit, and a licensed plumber for shutoff, standpipe, trap, or household drain defects. This educational guide does not claim to have inspected the appliance and does not represent verified repair credentials.
Prevention tips
- Inspect hoses for bulges, abrasion, corrosion, and damp fittings.
- Keep the machine level and avoid compressed loads.
- Remove hair and small objects from a front-load gasket.
- Use only the stated detergent type and amount.
- Never leave an actively leaking washer running to finish a load.
Listen for changed sounds, inspect the floor, and act on recurring messages. Do not normalize a symptom because the washer eventually completes.
Frequently asked questions
The FAQ panel on this page answers the most common searches without duplicating those answers here. For any procedure, the exact model manual remains the final authority.
Keep learning
- Back to the Washer Guide
- Related: Washer Not Draining
- Related: Washer Shaking Violently
- Electronics safety basics
Stopping, isolating water, and requesting help is successful troubleshooting when the remaining work involves mains electricity, heavy disassembly, stored energy, or uncontrolled leakage.